Once you receive Permission to Operate or PTO from your utility company, you’re ready to activate your solar energy system. Once activated, your panels can begin to produce power and save you money on your electricity bill.
What to Expect
- Estimated time: 10-15 minutes
- Tools required: none
- Activation is best completed during daylight hours.
- You will need access to your Electrical Panel, AC Disconnect, and Solar Inverter.
We’ll help you locate each!
Please note: You can only activate your system AFTER you’ve received “Permission to Operate” or PTO from your electricity company. If you’re waiting on PTO, revisit this video when you’re ready.
Preview the Process
Note: This video shows the activation process for homeowners with a SolarEdge inverter. The process will differ in Step 3 for homeowners with Enphase microinverters. See details and links below.
STEP 1: Reset your solar breaker
- Start by locating your main electrical panel or breaker box - typically a grey panel placed in a low-traffic area such as your basement, garage, utility closet, or outside.
- Once located, open the cover and look for a breaker switch marked “PV Solar Breaker” (PV meaning photovoltaic). It should be clearly labeled with a red sticker.
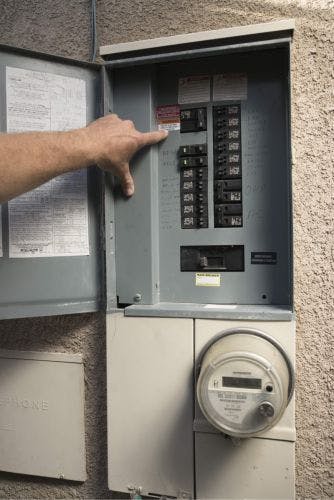
Note: If you do not see a PV Solar Breaker, skip to step 2.
- Turn the breaker to the OFF position, hold for a moment, then flip to ON.
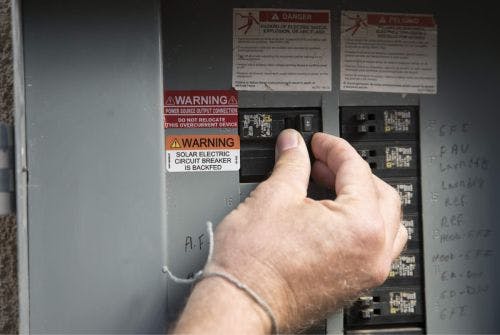
This completes step 1 and allows alternating current, or AC electricity, to pass from your Electrical Panel to your AC Disconnect and Solar Inverter.
STEP 2: Power your AC Disconnect
- In most cases, your AC Disconnect will be located on the outside of your home, adjacent to your electricity meter. Look for a small metal box with a large switch or handle on the side.
- Like your PV Solar Breaker, your AC Disconnect should be well labeled with a red sticker that reads “AC Disconnect” or “Photovoltaic System AC Disconnect.”
- To complete this step, lift all switches or handles to the ON position.

This allows alternating current or AC electricity to flow between your inverter and the grid.
STEP 3: Activate your solar inverter or IQ Combiner
Your solar inverter or IQ Combiner may be located next to your electrical panel, your meter, or your AC disconnect. Look for either a white box labeled “SolarEdge,” or a grey box labeled "ENPHASE."